Thursday, June 21, 2012

Costumes

I thought I'd go ahead and post some of the costumes that I've made already, with some brief explanation. Unfortunately when I was making these, I was not running my blog, and so I didn't take any progress shots.


This was my version of Maria's dress from The Sound of Music - the one in 'Do Re Mi'. The blouse is from a thrift store find of a sleeveless dress. I cannibalized the skirt of the dress to make the cuffed sleeves. The skirt was very simple, just panels gathered into a wide waistband. I *think* the panels were slightly trapezoidal, rather than rectangles, to reduce the bulk at the waist.


Here's the costume with the bodice on - I made it without a strict pattern. I looked at pictures from the movie, trying to pinpoint the seam lines and the shapes of the fabric pieces. From that I made a paper mock-up, and a 'muslin' from an old sheet. The bodice opens at the front, and is held together by a line of small hooks and eyes.


This costume was inspired by Degas' Little Dancer sculpture. 


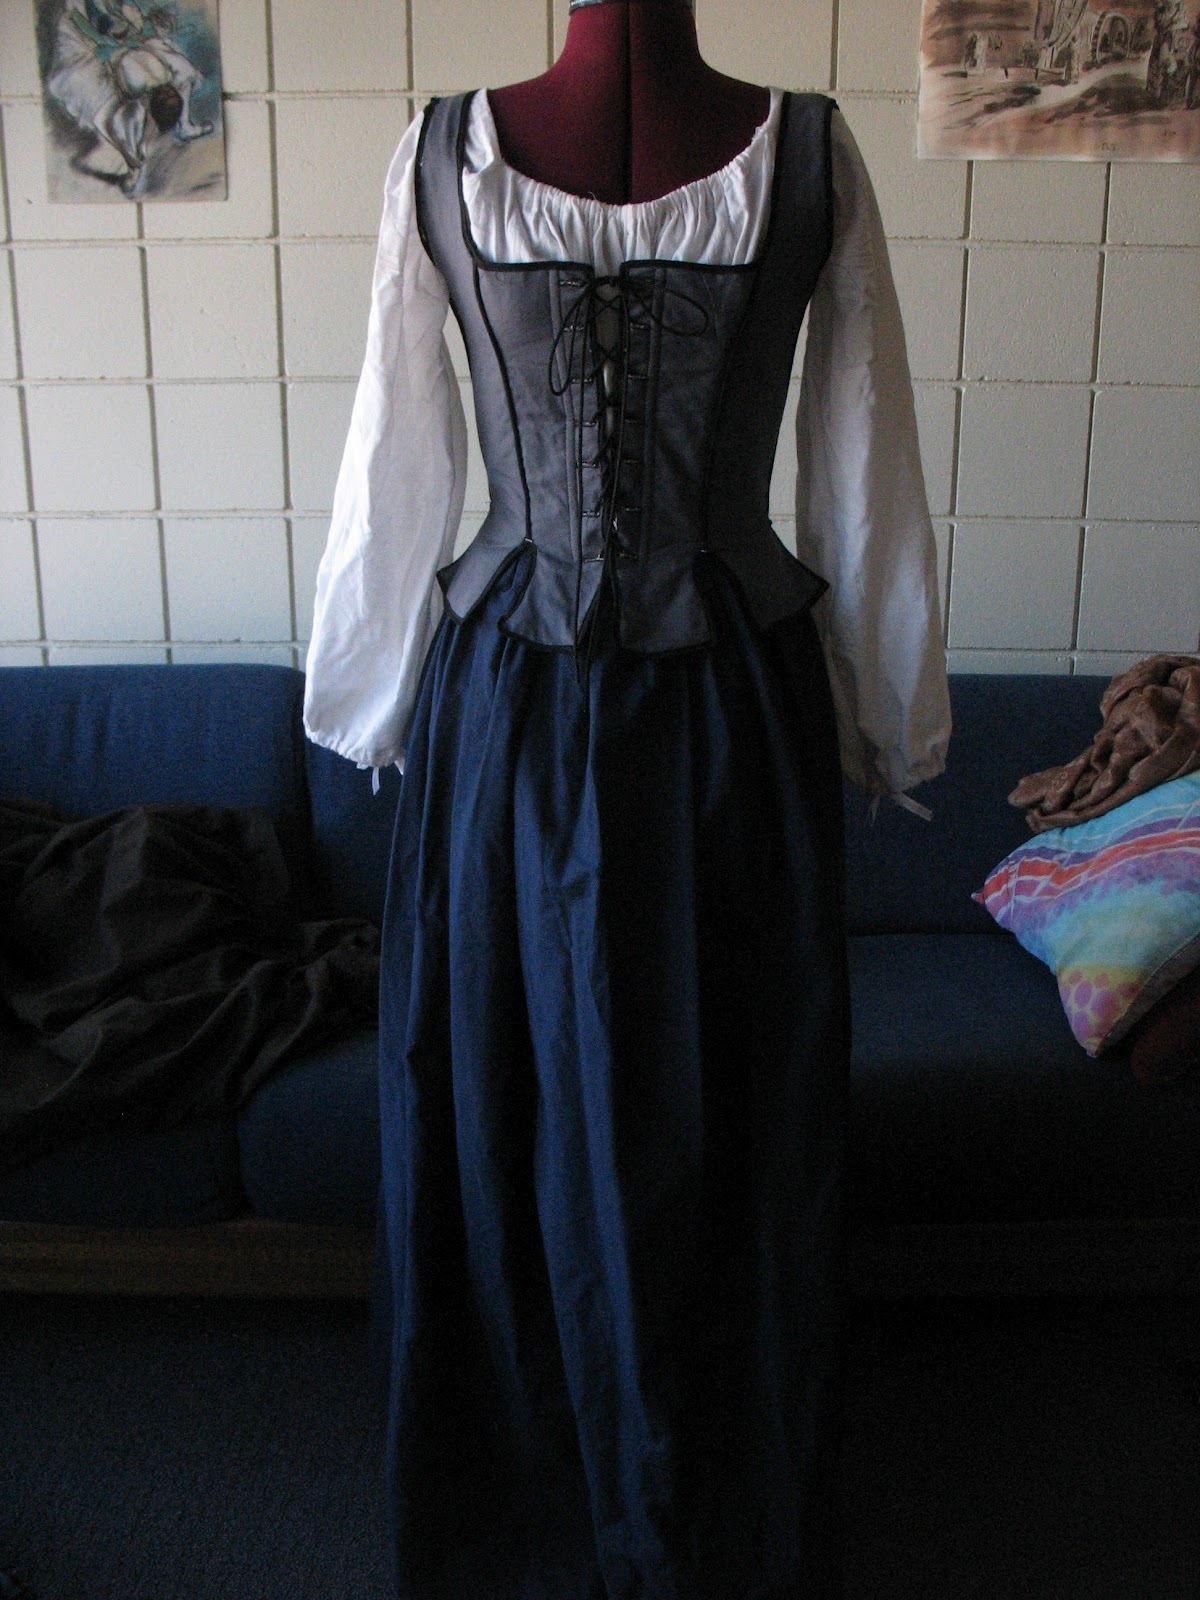
These two are costumes for the Renaissance Festival. I wish I could remember where I found the instructions for the chemises, but it was a fairly simple rectangle pattern with gathered neckline and wrists. The skirts were made from rectangular panels gathered into a waistband, to create the full-over-the-hips silhouette.


This is a Cleopatra costume. There's a white muslin shift, mostly unshaped, with a sheer white overdress that starts under the bust, with long straps in a v-shape. The shoulder cape opens at the back, and fastens with a button. The pleats were ironed in, and then sewn into the neck piece. The decoration is a zig-zag stitch on the sewing machine, with metallic embroidery floss woven in to add color and sparkle.

Sunday, June 17, 2012

Line embroidery

Recently I've been missing my time in Ireland a lot. As a way of dealing with that, I decided to go through some of my photos and sketches from that time, and transform them into line drawings that I can embroider. I've been drawing them straight on the fabric with pencil, and then using different colors of embroidery floss to pick out the design lines. I really like the way they end up - somewhat simplistic in form, but really lovely.

The first one is of a ruined church on Innismore, and the second one is actually from England, and the ruins of Glastonbury Abbey.


Friday, June 15, 2012

How to make applique easy

A while back I was talking with someone (I wish I could remember who) and discussing issues of applique embroidery. Knit fabrics can be finicky and don't want to stay in place, but they can be secured with a looser stitch and won't fray at the edges. Woven fabrics stay in place much better while you're working, but you have to be much more meticulous about stitching down the edges, and that can take a *really* long time. So, whoever this brilliant person was suggested that I use fusible interfacing to secure the edges of woven fabrics. Brilliant!


It was actually quite easy, and seemed to work with several different weights and types of fabric. Just take a small piece of fabric (bigger than your design) and a piece of fusible interfacing, iron them together as per product instructions, and then draw on either side and cut out your shapes. 

A note of warning: make sure your piece of interfacing is at least a little *smaller* than your fabric when you're ironing them together, or you'll fuse the overlapping sections of interfacing to your ironing board.... oops!


This thistle design on a plaid flannel is the only one I've sewn on to anything so far, but I really like how it turned out. I used a sort of connected running stitch to secure down the edges, and I really like how it gives a solid line, and doesn't take away too much from the plaid. Often I like to use a blanket stitch on the edge of knit appliques, but that would have been too busy here. The very edges of the flannel did start to fray a bit, but only after I'd sewn them down - the interfacing held everything together. Also, I feel like between the interfacing and the stitching, it's very secure. The bonus is that it took much less time than a satin stitch around all the edges to hold the loose threads in!


Here's just a bit of a sneak preview of what I'm making here - it's a smallish purse. I sewed the bottom edges together without turning them inside, in the hopes that I'd get a bit of a frayed edge to echo the appliques. It will still be getting a shoulder strap, hemmed top, and probably a tab and button closure, in the same flannel plaid.

Thursday, June 14, 2012

Watercolor stamps and a sunset

I've been very busy lately, as M's lovely family was in town. We spent a lot of time showing them around, and taking walks by the river. I was still working on things in the evenings, but I wasn't able to properly photograph and post them. I'll be putting up several different posts over the next day or so.

First, however, there was the most amazing sunset tonight. We've been having rain and thunderstorms all day, so the clouds were very impressive.


In craft news, I ordered a Speedball stamp making kit a while ago, and finally had a chance to play around with it. I've got to say, it's the neatest thing I've done in a while. It was just really so fascinating to take a simple sketch and transform it into a personalized stamp.


These are fairly small, on the order of an inch to an inch and a half. I think that's about the smallest I can accurately carve something at this level of detail. 


I think my favorite is the sheep :)

The material is surprisingly easy to carve. I was expecting it to feel like carving an eraser (probably due to the pink color), but it's a lot smoother, and doesn't crumble at all. I see myself making a lot more stamps in the future.

The reason why I originally wanted the stamps was because I'd had an idea for greeting cards that wasn't quite working out. I made some watercolor backgrounds, and wanted to draw images on them. However, the black India ink wasn't working - it was too harsh against the softness of the watercolors. Luckily, the stamps worked much better.


For all of this, I inked the stamps with some colored brush markers. It worked well, but also gives me a somewhat limited range of colors - not to mention that when I try to mix them, it seems to contaminate the marker tips. My next plan is to use a higher concentrated watercolor for the inking, and if that works, it will give me a much wider range of possibly colors. 

I haven't mentioned this before, but some of the things I talk about on this blog are/will be for sale on my Etsy shop, Piping Hot Tea. Often they'll show up here on the blog before they're on Etsy, because I'll show progress shots here, and the Etsy listings have to wait for final glamour shots. 

Wednesday, May 30, 2012

Geometric shawl pattern

Ok, so I don't actually have any experience writing patterns. I've written a few down for my own use, like when I make up a mitten pattern, and have to make sure I can replicate it for the other hand! So I'm going to give you the basic instructions for this shawl I made, and I'm happy to answer any questions.


I made a somewhat small shawl, because that's all the yarn I had of this type. But after trying it on, I've decided that I really like how it's shorter in front - it's handy for keeping your back and upper arms warm, but you still have good mobility. I haven't decided how to fasten it yet - either a shawl pin of some sort, or I might try to work a button fastening.

To start off, make 5 chain stitches and slip stitch them together in a loop.
Make approximately 8 double crochet stitches in this loop (this number will depend on the size of your stitches and the weight of your yarn - you want to make enough to go about two thirds around the circle)
Turn, chain 3, and double crochet twice in each stitch to the end of the row.
Turn, chain 3, and double crochet twice in the first stitch, once in the second, repeating until end.
Turn, chain 3, double crochet twice in the first stitch, once each in the next two, repeating until end.

This process will continue throughout the entire piece. It's how you expand a circular (or semi-circular) piece so that it will grow outwards but still lay flat, without curving like a hat or bowl. For each row increase the number of solitary double crochets between the two double crochets (increase) by one.

Make five rows of double crochet from the beginning.
On the sixth row, double crochet in the first stitch, then chain 1, skip a stitch, and double crochet in the next stitch. This creates the lacy row. When you hit a spot where you need to increase, double crochet, chain 1, but then double crochet in the immediate next stitch rather than skipping one.

Between each 'lace' row, make three rows of solid double crochet. You can continue this pattern as long as you want to make a bigger shawl. I ended up with six 'lace' rows, and added one on the end to make a border.

Making a shawl that is more than just a half circle means that it is slightly shaped, and will stay on your shoulders fairly well even without a fastener. It also reduces the bulk that can build up at the back of your neck with folds from a circular or square shawl.

Thursday, May 24, 2012

Fabric sources

Today has been a beautiful rainy day, full of heavy showers, wind and some lightning. It was a good day for staying inside and working on projects, so I finished a shawl/capelet that I've been working on. It's too dark for proper photos, so those will be coming in a couple days, along with a pattern. Instead, I'll share with you my favorite place to go fabric shopping.

For a long time, my only source of fabric was Jo-Ann. It was what we had always gone to, and they do have a decent selection (and lots of lovely colors and prints in cotton). I knew that there were such things as fabric warehouses where you could find all sorts of beautiful and exotic fabrics, but I had never seen one.

I've still never been to one. Instead, I've discovered the treasure trove of thrift stores. Yes, thrift stores. It's easier if it's a bigger one, like Goodwill, or around here we have Savers. However, I've also seen good things in smaller places, so it just depends on how patient you are.

Of course there are things like skirts and dresses that you can buy and take in, cut up, or alter. I recently cut the top off of a hideous prom dress because it had a really wonderful skirt, took in the waist a bit, and it became part of a costume for a friend. But what's also great is to head to the linens section. Sheets and curtains come in all sorts of colors and fabrics, and are usually pretty cheap. Pillowcases are also wonderful - you only need two  for a double layer Victorian-style corset.

These are some pieces I got a while ago at the thrift store - the orange and green are silky sheets, approximately queen-size. They will be enough for a dress each. The purple brocade-type fabric is actually from a couple of chair covers. I had to cut them up to access the flat pieces of fabric, but it's being turned into a fitted skirt with ruffles.

The thrift store is a great place to look if you're open for the fabric you want to use in a project, but it can also work if you have more specific guidelines. It's a great place to have fun looking for fabrics, and the prices are amazingly cheap.

Happy hunting!!

Tuesday, May 22, 2012

Spock on a block

A friend and I collaborated to make a present for a mutual friend. The recipient of the gift recently got into yoga, and she's a huge fan of Star Trek. So, naturally, we decided to try and decorate a yoga block for her.


It was surprisingly easy, if a bit time consuming due to the complexity of the design. The secret? India ink. It's easy to brush on in thin or thick lines, creates an even coat, and most importantly, it's waterproof! I had originally thought of using a sharpie, and you could probably use one anyway, if that's all you have on hand (especially if your design was simple and mostly lines). But india ink is not too expensive, and lasts a long time. It really made filling in the large black areas a lot quicker and neater than coloring with a marker.

Since our block was a medium purple (and maybe also due to the foam material), the basic go-to of a graphite transfer for the design didn't work. So instead, after the image was on a piece of paper, I held it in place on a side of the block, and used a small sewing needle to prick along the outlines - closer together in more detailed areas, farther apart where the lines are straight. After that was done, it was just the simple, if delicate, process of painting in the lines that were created by the needle. The small holes left by the needle do still show, but only if you look at it very closely.

The block hasn't been used yet, so I don't know if the design would wear off quickly or at all. However, it's a fun way to individualize your yoga block.